Are you thinking of transferring emails from GMX Mail to Office 365 for any reason? For some users, this email migration may seem like a daunting task as they have no prior experience with it. For them, we have come up with this article. In this complete guide, we will show you the step-by-step process to migrate emails from GMX Mail to Office 365. So, let’s start reading.
GMX Mail (Global Mail Exchange) is a free email service developed by the German company 1&1 Mail & Media GmbH. It is known for its huge email storage capacity, user-friendly interface, spam protection, and many other functionalities. GMX has been a popular choice for individuals as well as small business email users around the world.
It also includes features like multiple email aliases (10+) and POP3/IMAP support for use via desktop email clients. However, as businesses grow or users look for a more advanced platform, most users prefer to migrate to a more robust platform like Microsoft Office 365.
Also Read: – How to Migrate Email from Google Workspace to Office 365?
Microsoft 365 / Office 365 – Overview
Microsoft 365 (formerly called Office 365) is a leading cloud productivity suite available for both individuals and businesses. It includes online access to powerful Microsoft tools like Outlook, Word, Excel, Teams, OneDrive and more.
Speaking of email, Microsoft 365’s Outlook platform offers enterprise-level security and smart features that are hard to match with other email providers. Its cloud-first architecture ensures your data is available anywhere, anytime, and on any device.
Benefits of Migrating Emails from GMX to Office 365
Migrating emails from GMX Mail to Office 365 can serve many practical needs, such as-
- Email Backup and Archiving: – Transferring emails from a GMX Mail account to Office 365 acts as an additional layer of backup. This ensures that your important GMX emails remain safely stored in another location and platform. This email backup will be available for use even if, in the future, you are unable to access the GMX account due to inactivity or inability to access.
- Business Platform Upgrades: – GMX is primarily a personal use email service. For growing businesses or professionals, Office 365 offers a more robust and feature-rich environment that is optimized for work. It improves team collaboration and secure communications.
- Storage/Mailbox Organization: – If you’re running out of space in your GMX mailbox, moving old or important emails to Office 365 can be a great help. By moving some emails to Office365, you can clear them from your GMX account inbox and organize your email data better.
Smart Solution: GMX Mail to Office365 Migration Tool
Transferring your emails from GMX Mail to Office 365 is no longer difficult – especially if you have the right tools – eSoftTools GMX Mail Backup and Migration software. This single tool allows users to safely transfer GMX Mail emails to Office365 with few simple clicks.
It is a reliable and user-friendly solution that enables you to download and transfer emails from all GMX mailbox folders—inbox, sent items, drafts, and other folders. Whether you are a business professional, an IT administrator, or an individual user, this tool ensures a smooth and secure migration.
This software also includes smart options – such as date range, folder selection – that give you full control over the migration.
How to Migrate Emails from GMX Mail to Office 365? [Step-by-Step Guide]
Follow the detailed steps below to safely and efficiently transfer emails from GMX Mail to Office 365 account using eSoftTools GMX Email Backup & Migration tool: –
- Download eSoftTools GMX Email Migration Software for windows from the official source.
- Install the software on your Windows system by running the setup file and completing the installation process.
- Launch the application, and from the list of available email sources, select the “IMAP Server/Webmail” option.
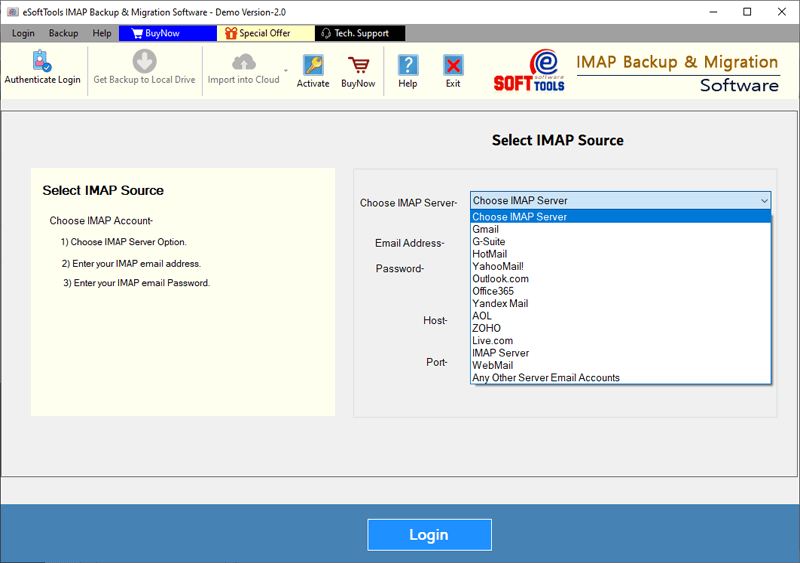
- Enter your GMX Mail account credentials in the required fields:
- Email Address: (example: user@gmx.com,)
- Password: – Enter GMX account’s associated password
- IMAP Server: imap.gmx.com
- Port: 993 (ensure SSL is enabled)
- Click on Login button to authenticate and connect with your GMX account and load all associated email folders.

- Once your mailbox is successfully loaded, select specific folders that you wish to migrate (e.g., Inbox, Sent, Custom folders).

- Click on the “Import to Cloud” option to proceed with the migration setup.
- From the list of supported cloud platforms, select “Import to Office 365” and click Next.

- Enter your Office 365 email address where the GMX emails will be delivered.
- Adjust additional settings as needed:
- Input Folder: Provide a name for a new folder in your Office 365 account where the software will save all emails.
- Email Filter: Apply date range filter and select a period of email to transfer only necessary emails.
- Click on the Convert button to proceed for authentication and migration steps.

- When prompted consent screen, sign in to your Office 365 account and grant access permissions.

The software will begin the migration process. You can monitor the progress in real-time and after the success all GMX Mail emails you will get in Office 365 mailbox.
Conclusion
Migrating emails from GMX Mail to Office 365 is neither complex nor time-consuming. With the help of a reliable tool like eSoftTools GMX Email Migration Software, the whole process becomes efficient—even for non-technical users.
Whether you are backing up your data, changing email platforms for business needs, or simply want to organize your mailbox, this tool will work best in all cases to meet your goals.
By following the step-by-step instructions above, you can confidently transfer your valuable email data to Office 365. So, take advantage now.